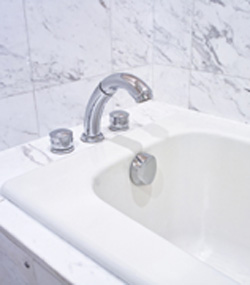
Mildew around your tub?

by Jean Nayar
Over time, the caulk that seals the gap between your bathtub and the walls that surround it can become discolored with mildew that’s hard to clean. Or it can loosen and allow moisture to penetrate the gap, causing water, mold and mildew damage inside the wall as well as behind and underneath the tub. Removing and replacing the caulk around your bathtub is a relatively simple project you can do yourself. The following instructions explain what you need to have on hand and how to do it.
Warning: Prolonged exposure to excessive amounts of some molds may pose fatal health hazards. If you suspect bathtub mildew has spiraled into a mold problem, call in a professional immediately.
Supplies
Caulk softener (optional)
Utility or putty knife
Rust-proof steel wool soap pad or scouring pad
Bleach cleanser
Kitchen wipes
Denatured alcohol
Paper towels
Mildew remover (optional)
Scissors
Canister or squeezable tube of white caulk
Caulking gun (optional)
Sponge>
Instructions
1. Remove old caulk.
If desired, apply a caulk softener to the caulk and let stand for two hours. Slide the utility or putty knife, along the top edge of the caulk to break the seal. Continue scraping off the old caulk by gently pushing the knife along the wall and across the edge of the tub all around.
2. Clean the area.
Use a moistened steel wool pad or scrubber sponge and bleach cleanser to remove any remaining caulk. Use a kitchen wipe moistened with denatured alcohol to thoroughly clean the wall and tub along the gap. Wipe the area with a paper towel to make sure that the surface is completely dry and free from any old caulk debris. If there is any mildew, use a mildew remover to clean the area, and let it dry thoroughly overnight. Before applying the new caulk, fill up the tub with water to ensure the tightest seal. (When the tub is filled, pressure builds up around the perimeter, and when the water drains, the tub slightly contracts.)
3. Caulk the bathtub.
If you’re using a caulk canister, load the tube into the caulking gun (or remove the cap if you are using a tube). Use the scissors to cut a small hole at the tip of the caulk tube at a 45-degree angle. Then, starting at one short edge of the tub, squeeze the tube or the trigger of the caulk gun to apply an even 1/4-inch bead line of caulk along the gap between the tub and the wall, pulling the gun or tube in the opposite direction that the tip is pointing as you go. Lighten up slightly at the corners to avoid pooling.
4. Smooth the caulk.
When the bead line is complete, dampen your index finger with water and gently run it over the caulk to tighten the seal and smooth out the caulk all around the tub. Wipe off the excess caulk from your finger with a paper towel and wipe away any excess caulk along the wall or tub with a clean, wet sponge.
5. Allow caulk to dry.
Let the new caulk to dry for 24 hours before using the bathtub.
Jean Nayar is a licensed real estate agent and design journalist who’s authored nine books on decorating and design, including Green Living by Design, the best-selling Staged to Sell (or Keep) and The Happy Home Project: A Practical Guide to Adding Style and Substance to Your Home. The former editor in chief of Kitchens & Baths, Easy Decorating and Remodeling & Makeovers blogs at TheHappyHomeWorkshop.com about living with style, sustainability and substance.


